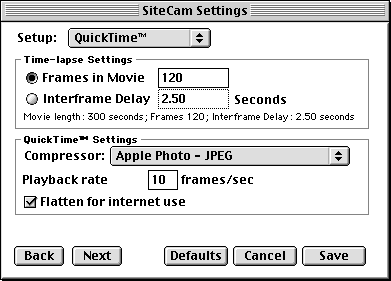
Creating automated time-lapse movies is easy... Here are the steps required to get it going.
Create a new SiteCam document by selecting New in the File menu (Cmd-N). (You do not need to close other SiteCam documents before creating a new document.)
Save it as "qt" (in your startup items folder, if you like.)
Open the Output Format dialog from the Document menu (Cmd-E).
In the Media Format section: Set the format as QuickTime. Set the size to 320x240.
Select Interval from the Setup popup menu: Set the interval to 5 minutes, start immediately (or Normal, if you like) A new movie will be created every 5 minutes. Later, you can change the interval to 1 hour to make a movie that covers more time.
Under Destination: Set the destination directory where you want the movies saved. If you don't specify, they will be saved in the SiteCam folder.
Set the destination directory to: the SiteCam documentation's "images" directory. You can also FTP your movies to a remote location by setting the FTP settings.
Under QuickTime (below): Set the number of frames to 120. Set the playback rate to 10.

Save the changes.
Select Start Periodic Capture in the document menu to start recording.
You'll see that the Format line in the status window will start to show how many frames have been added to the current movie. When it finishes with the movie, it will be saved in the directory you specified.
When the movie is done... watch your movie. (If it does not show up in your browser, you can just select the file and view it from your computer. Then check the destination directory and that you have Netscape/IE configured to play embedded QuickTime movies.)
Your movie will play back in 12 seconds (120 frames / 10 frames per second).